
Have you ever gone to your friend or mother's house and fell in love with one of their plants? Did you find out later that the plant was hard to find or expensive? Or, do you have a plant that your friends are just ooohing over? I wanted to share with you a process that you can use (if you have the permission, of course) to "clone" a larger plant called Air Layering. This process works by wounding or scarring a plant's branch and guiding to make roots while still on the plant, then removing that branch to be potted. This may sound like a hard DIY, but honestly, it's pretty simple!
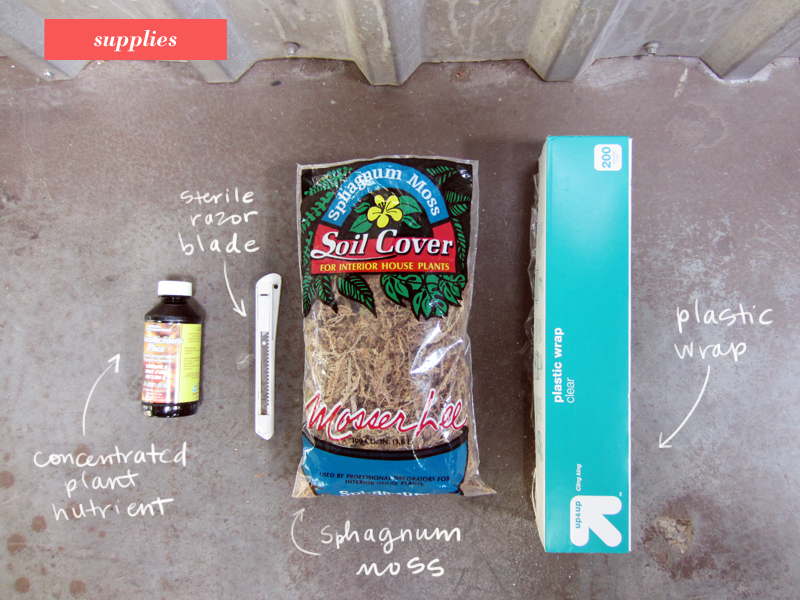
What You'll Need:
+ 2-3 drops of concentrated plant nutrient (I used this one, but I recommend this one too)
+ sterile razor blade
+ sphagnum moss (I found mine at a local garden department)
+ plastic wrap
+ mixing container
+ rubber band
Steps:
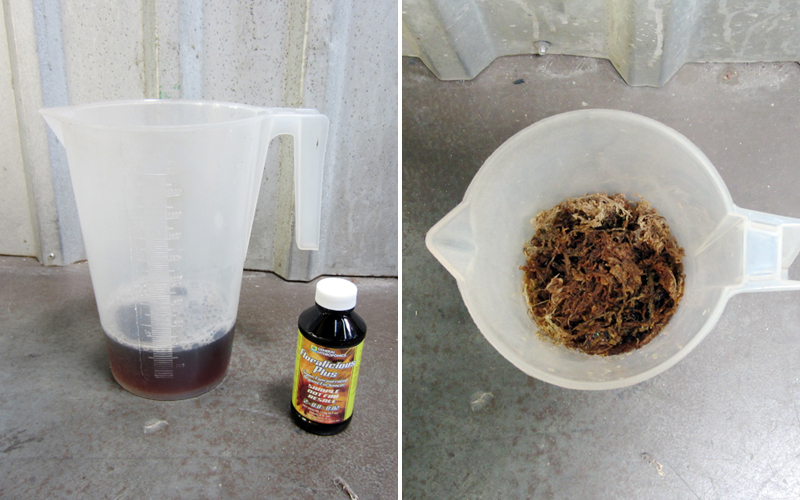
+ Fill your container with roughly 2 cups of water
+ Drop about 2-3 drops of the plant nutrient into the water
+ Put a handful or two of sphagnum moss in the liquid until most of it is absorbed by the moss
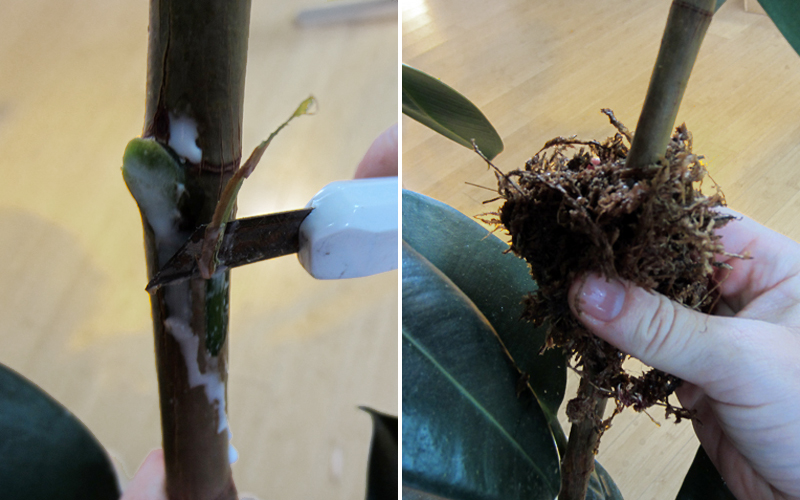
+ With your razor blade, cut and scrape into the branch, taking off the first few layers of the branch
+ Continue scraping the branch around the circumference of the branch
+ Apply a handful of the sphagnum moss around the branch so it covers a larger area around the wounds
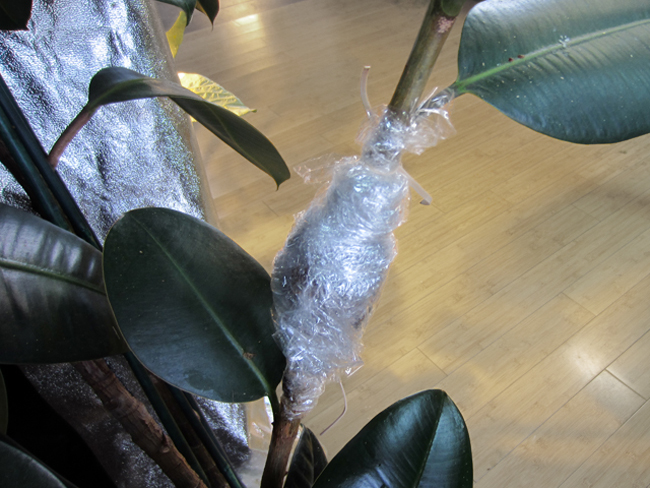
+ Wrap the sphagnum moss snugly with plastic wrap
+ Cut a rubber band in half and tie the ends (around the sphagnum moss) tightly
About once a week you will want to check on your branch. Use a syringe or even a straw to insert a small amount of the nutrient mixture to make sure the moss is still moist. Depending on the plant, it could start rooting within 2-3 weeks. When you start seeing roots inside the plastic wrap, remove the wrap and moss and make a clean cut of the branch just below the roots. Once you plant it, you're done!
I know for a first tutorial, this might sound a little complicated, but it's not so bad. If you can follow a food recipe, you can do this! And if you're wondering, I used a rubber tree for this project. Using this method, they root very quickly.
Good luck and feel free to ask me questions if you have any problems!
top image by kate miss, all others by me.

Awesome! I have always wondered how to do this. I'm going to have to give this a try. Thanks Ciara.
ReplyDeleteWhaaaaaaaaaaaattttt. Is this magic?
ReplyDeleteIt's totally magic. And awesome!
DeleteGenius! Thanks!
ReplyDelete